Introduction
Radiography is not the only imaging tool in a modern practice. Ultrasound is probably the second most commonly used imaging method in veterinary practice, and many referral and some general practices also run computed tomography (CT) and magnetic resonance imaging (MRI) units.13 Flexible endoscopes let the veterinarian look inside the airway, esophagus, stomach and colon.
The veterinarian or radiologist reads the images. The credentialed veterinary technician prepares and positions the patient, picks and sets up the equipment, runs anesthesia, keeps everyone safe around the magnet, and cleans and stores delicate scopes. The VTNE places this material in Domain 6, Diagnostic Imaging, and in the equipment care knowledge area.10
Key facts
- Diagnostic ultrasound uses sound waves, most often 1.5 to 18 megahertz (MHz). A transmission gel couples the transducer to the skin.1
- Low-frequency transducers scan deeper, but resolution is lower. High frequency gives finer detail at shallow depth.1
- Sound is almost totally reflected at soft tissue and gas interfaces and absorbed at bone, so gas and bone cast shadows.1
- CT measures density in Hounsfield units (HU): air is -1,000, water is 0. Nearly all veterinary soft tissue CT studies use contrast.3
- MRI uses no ionizing radiation, but its magnet can pull an oxygen cylinder into the scanner at nearly 100 miles per hour. Small animal MRI is done under general anesthesia.2
- An MR suite has four zones. Zone IV is the magnet room and carries the highest risk.4
- Leak test a flexible endoscope before immersion, then clean, high-level disinfect, rinse, dry and store it hanging vertically.6
How the VTNE tests this
- Choose the transducer: match frequency to patient size and the depth of the organ (Domain 6 Task B; K39).10
- Use echogenicity terms: name an anechoic, hypoechoic or hyperechoic structure, or an acoustic shadow (Domain 6 Task A; K39).
- Prepare the patient: clipping, gel, fasting and enemas for endoscopy, anesthesia for CT and MRI (Domain 6 Task B).
- Apply MRI safety: screen people, patients and equipment for ferromagnetic material before Zone IV (Domain 6 Task B; K40).
- Care for equipment: endoscope leak testing, reprocessing order and storage (Domain 6 Task C; K45).10
Core concepts
Ultrasound physics in plain words
The transducer (probe) sends a very short pulse of sound into the patient, then switches to listen. An echo forms wherever the sound passes from tissue of one density to another. The bigger the change, the stronger the echo. The machine records how strong each echo is and how long it took to return, and builds a real-time grayscale picture called B-mode.1 Images are saved in DICOM format, the accepted legal format, just like digital radiographs.1
Frequency versus penetration. This is the most tested physics rule. Low-frequency transducers scan deeper than high-frequency transducers, but resolution is decreased.1 A WSAVA congress lecture gives typical choices: about 5.0 MHz for large patients, and 7.5 or 10 MHz for small to medium dogs, cats and superficial structures.8 In cats, the frequency is often set to the highest level because the patient is small.9 The operator also adjusts depth and gain (overall brightness).9
Echogenicity terms
Echogenicity is how bright a tissue looks, and it is always judged by comparing one tissue with another.18 Learn the words below. Fluid such as urine or bile is the classic anechoic structure.
| Term | What you see | Typical example |
|---|---|---|
| Anechoic | Black, no echoes | Fluid, such as pleural effusion or urine |
| Hypoechoic | Darker than surrounding tissue | Normal liver compared with spleen |
| Hyperechoic | Brighter than the comparison tissue | Fat; reverberation lines from gas |
| Acoustic shadow | Anechoic band deep to a strong reflector or absorber | Bone, gas, uroliths, gallstones |
| Acoustic enhancement | Bright zone deep to a fluid-filled structure | Deep to the gallbladder |
| Reverberation | Evenly spaced bright lines deep to a strong reflector | Gas; A-lines from the lung surface |
Sources: Swanstein and colleagues, JFMS 2024; Boroffka, WSAVA 2015; Armenise, Animals 2025; Merck Veterinary Manual, Feline Hepatic Lipidosis.981112
CT in plain words
CT passes an x-ray beam through the patient from many angles. A computer works out the density of each small volume of tissue (a voxel) and builds a cross-section called a slice. Density is given in Hounsfield units, from -1,000 for air through 0 for water to +3,000 for heavy metal.3 Because slices do not overlap, CT shows structures without superimposition and has much better contrast resolution than radiographs.3 CT uses ionizing radiation, so the radiation safety rules from radiography still apply.
MRI in plain words
MRI uses a powerful magnet, up to 60,000 times the strength of the earth's field, to line up hydrogen atoms. Radiofrequency pulses tip them, and as they relax they give off signals that the scanner turns into images.2 Each sequence can take several minutes, and MRI is very sensitive to motion, so small animal studies are done under general anesthesia.2 MRI shows soft tissue, cartilage and the nervous system in great detail but images cortical bone less well than CT.2
The magnet is the hazard. Ferromagnetic material (iron and most steel objects) cannot be brought into the room, because the field can accelerate an object such as an oxygen bottle to nearly 100 miles per hour.2 The FDA lists projectile events, burns, crushed fingers and hearing loss among reported MRI injuries.5 Metal also ruins images: even the iron in an identity microchip, or a single steel BB pellet, can degrade the study, so radiographs of the area of interest are taken before MRI.2
| Zone | Area | Access |
|---|---|---|
| I | Public areas outside the MR environment, such as the waiting room | Unrestricted |
| II | Area between I and III where patients are brought in and screened | Supervised |
| III | Control room | Highly restricted; MR personnel only |
| IV | Scanner magnet room, highest risk | Trained personnel; door locked when unattended |
Source: Shah and Aran, Cureus 2023, summarizing the ACR Manual on MR Safety.4
Procedure or technique
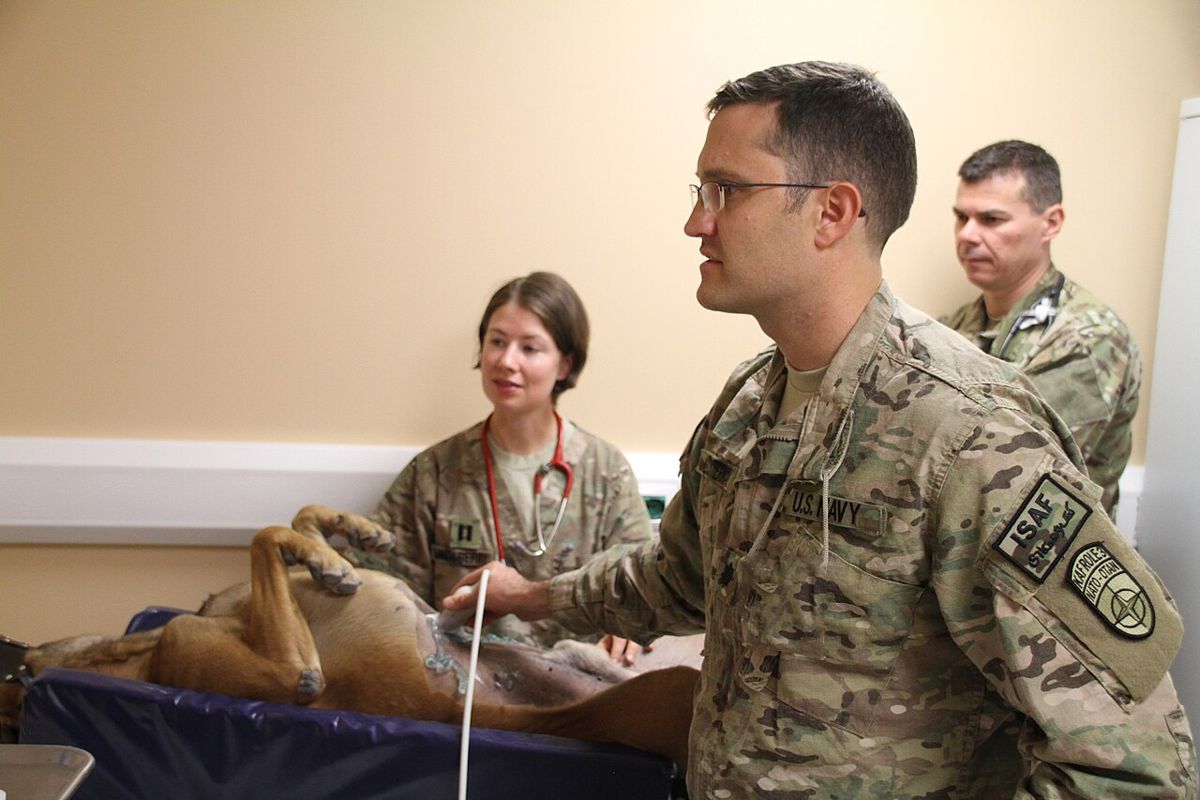
Abdominal ultrasound: the technician's steps
- Confirm the request and the patient's identity. Ask the veterinarian whether the patient should be fasted.
- Restrain the patient in dorsal recumbency. Abdominal ultrasound is usually done in the conscious animal.8
- Clip the hair over the ventral abdomen and apply contact gel for good transducer to skin contact.8 Air between probe and skin blocks the sound.1
- Select the transducer and preset for the patient's size, then adjust depth and gain.9
- Label and save images in DICOM format to the patient record.1
- For ultrasound-guided sampling, set up the needle, syringe and slides. Guidance is safer and more diagnostic than a blind biopsy.1
- Wipe gel off the patient and clean the transducer as the manufacturer directs.
CT: preparation and positioning
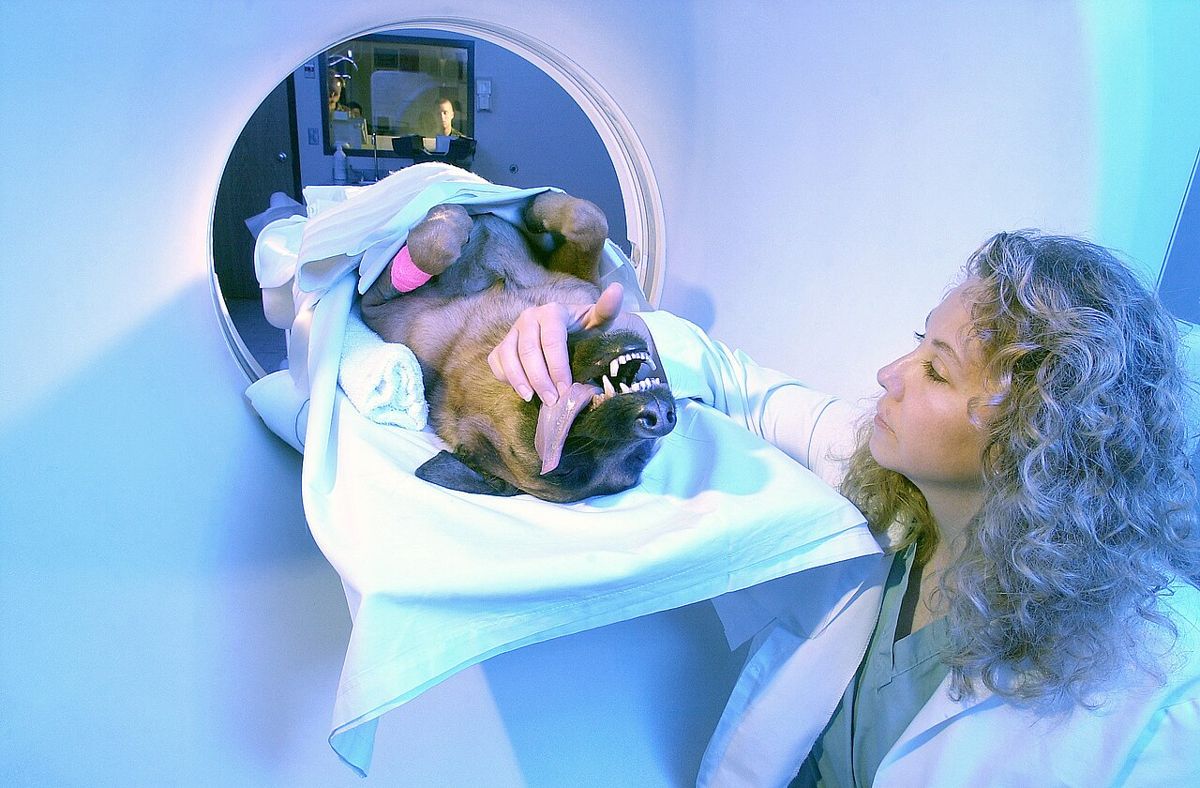
- Complete the pre-anesthetic workup. Most veterinary CT studies need anesthesia and immobilization, though the anesthetic period is short.3
- Place an IV catheter for contrast. Nearly all veterinary CT studies of soft tissue, such as the brain and abdomen, are contrast enhanced, and nonionic contrast agents improve diagnostic accuracy.3
- Position the patient straight and symmetrical with foam pads and ties. Scans of awake or lightly sedated animals lack controlled positioning, show movement and are hard to interpret.3
- Monitor the patient through the scan and after the contrast injection, and record the contrast agent and volume.
MRI: preparation
- Screen the patient: microchip, implants, surgical clips, gunshot. Radiograph the area of interest first.2
- Screen yourself and every handler. Remove keys, phones, pens, scissors, stethoscopes and clipboards. Use MR-labeled equipment only; ASTM F2503 labels devices MR Safe, MR Conditional or MR Unsafe.4
- Induce anesthesia outside Zone IV. Use MR-compatible anesthesia machines, oxygen supply and monitors; if these are not available, injectable anesthesia can be used.2
- Provide hearing protection. Gradient noise can reach 100 dB or more.4
- In an emergency, MR-trained staff move the patient out of Zone IV to a magnetically safe area before resuscitation.4
Endoscopy: patient prep and scope care
Endoscopy is done under general anesthesia to protect both the patient and the expensive scope.7 Fast most patients 12 to 24 hours before upper GI endoscopy, longer (24 to 48 hours) if gastric emptying is delayed. For colonoscopy, fast 24 to 48 hours and give warm-water enemas the evening before and again 2 to 4 hours before, until the return is clear.7 Do not use Fleet enemas (a mildly hypertonic enema solution) in cats or small dogs.7
Flexible endoscopes are heat sensitive, semicritical items (they touch mucous membranes). They must be cleaned and, at a minimum, high-level disinfected after each use.6 Meticulous cleaning must come before disinfection.6
| Step | What the technician does |
|---|---|
| Leak test | Before immersion, check the scope for leaks so fluid cannot enter a damaged scope |
| 1. Clean | Brush internal channels; flush each channel with water and detergent or enzymatic cleaner |
| 2. Disinfect | Immerse in high-level disinfectant and perfuse all channels for the product's contact time |
| 3. Rinse | Rinse the scope and all channels with sterile, filtered or potable tap water |
| 4. Dry | Flush with alcohol and dry with forced air |
| 5. Store | Hang vertically in a way that prevents recontamination and promotes drying |
Source: CDC Guideline for Disinfection and Sterilization in Healthcare Facilities.6
| Modality | Patient prep | Main safety point |
|---|---|---|
| Ultrasound | Clip, gel; often awake with restraint | No ionizing radiation; gel and probe hygiene |
| CT | Anesthesia, IV catheter, contrast | Ionizing radiation; contrast monitoring |
| MRI | Anesthesia, metal screening, radiographs first | Projectiles in Zone IV; burns; noise |
| Endoscopy | Anesthesia; fasting; enemas for colon | Leak test and high-level disinfection |
Sources: Merck Veterinary Manual; Ford and Mazzaferro; CDC; Shah and Aran.123467
Flowchart
Species differences
- Dogs: transducer choice depends on size. A large, deep-chested dog may need about 5 MHz; small and medium dogs use 7.5 or 10 MHz.8
- Cats: small size means the highest frequency setting is often used, and presets work well because cats vary less in size than dogs.9 Clip only what is needed and keep the cat warm.
- Horses: ultrasound is used most often for tendon and ligament tears, and transrectal ultrasound for reproduction.1 Standing MRI of the distal limb is done under sedation; recumbent MRI needs general anesthesia.2 Standing CT systems with a moving gantry exist for sedated horses.3
- Ruminants and other large animals: transrectal ultrasound of the reproductive tract is routine, and ultrasound-guided sampling can be done without general anesthesia.1
Safety, legal and client education
- MRI uses no ionizing radiation, which protects staff.2 CT uses an x-ray beam, so follow the same radiation safety rules as for radiography.3
- Lock the Zone IV door when no one is attending it, and keep it under supervision by trained personnel.4
- A quench is the rapid release of the magnet's liquid helium through a vent pipe. If the pipe fails, helium in the room can lower oxygen levels.4
- Saved ultrasound, CT and MRI images are part of the medical record; the DICOM format is the legal standard.1
- Explain to clients that clipping is needed for a clear ultrasound image, that CT and MRI need anesthesia because any movement ruins the study, and why their pet must be fasted before endoscopy.237
- Endoscope reprocessing staff should get initial and annual competency testing.6
Common mistakes and exam traps
- Reversing the frequency rule. Higher frequency means better detail but less depth, not more depth.1
- Calling fluid hyperechoic. Simple fluid is anechoic (black); bone and gas cause shadows.19
- Thinking a microchip is harmless in MRI. Its iron can cause significant image artifacts.2
- Running into Zone IV with a steel oxygen cylinder or crash cart during an emergency. Move the patient out instead.24
- Soaking an endoscope before the leak test, or storing it coiled and wet. Leak test first, dry fully, hang vertically.6
- Assuming CT is done awake. Most veterinary CT studies need anesthesia.3
Memory aids
LOW goes LOW: low frequency goes low (deep) in the body; high frequency stays high near the skin with finer detail. (memory aid)
HYPER is HIGHLIGHTED: hyperechoic structures are brighter; hypo is darker; anechoic means "no echo" and looks black. (memory aid)
Zone IV, the fourth wall is the magnet: zones count up from the waiting room (I) to the magnet room (IV), where the risk is highest. (memory aid)
Leak before you soak: leak test a flexible endoscope before immersing it. (memory aid)
Can Doctors Really Dry Scopes: Clean, Disinfect, Rinse, Dry, Store, the CDC endoscope reprocessing order. (memory aid)
Quick review
- Diagnostic ultrasound uses about 1.5 to 18 MHz; gel couples probe to skin.
- Low frequency penetrates deeper; high frequency gives better resolution.
- About 5 MHz for large patients; 7.5 to 10 MHz for small dogs and cats.
- Anechoic is black (fluid); hypoechoic is darker; hyperechoic is brighter.
- Gas reflects and bone absorbs sound, leaving acoustic shadows.
- Abdominal ultrasound: dorsal recumbency, clip, gel, often awake.
- CT density is in Hounsfield units: air -1,000, water 0.
- Most veterinary CT and all small animal MRI studies need anesthesia.
- Radiograph the area before MRI; microchips and BB pellets cause artifacts.
- MR zones I to IV; Zone IV is the magnet room with the highest risk.
- Upper GI endoscopy: fast 12 to 24 hours; colonoscopy: 24 to 48 hours plus enemas.
- Endoscope care: leak test, clean, disinfect, rinse, dry, hang vertically.