Introduction
Most of a tooth sits below the gumline, so a visual exam and probing miss a lot. AAHA strongly recommends full-mouth intraoral dental radiographs in all dental patients, and the American Veterinary Dental College (AVDC) firmly advocates full-mouth intraoral radiographs, or similar full-mouth imaging such as cone beam CT, during dental procedures.34 In most practices the credentialed veterinary technician takes these images. The veterinarian reads them and makes the diagnosis.
This guide covers the image receptors (film, phosphor plates and direct sensors), the parallel and bisecting angle techniques, the tube head angles that work for each tooth group, how to fix elongation and foreshortening, how to orient and mount the images, the normal structures you will see, the SLOB rule for split roots, and radiation safety in the dental suite.
Key facts
- All dental radiographs are taken with the patient under general anesthesia.5
- Parallel technique: receptor parallel to the tooth, beam perpendicular to both. It works only for the caudal mandibular cheek teeth (premolars and molars).1
- Bisecting angle technique: find the angle between the tooth root and the receptor, cut it in half, and aim the beam perpendicular to that bisecting line. It is used for all other areas.15
- Beam angle to the receptor too small gives elongation (image too long). Too great gives foreshortening (image too short).1
- Simplified technique uses three angles: 90 degrees (mandibular cheek teeth), 45 degrees (maxillary premolars and molars) and 70 degrees (canines and incisors).1
- SLOB: same lingual, opposite buccal. The lingual (palatal) root moves the same way the tube is shifted.1
- If you cannot leave the room, stand at least 6 feet from the tube head, 90 to 135 degrees from the primary beam, and never touch the tube head during exposure.3
How the VTNE tests this
- Pick the technique: which teeth allow the parallel technique and which need the bisecting angle. Domain 3 Task D (produce diagnostic dental radiographs); K21 (dental procedures, including dental imaging).7
- Fix the error: roots too long or too short, apex cut off, roots superimposed. Expect "what do you change?" scenario items.
- Read the orientation: maxilla or mandible, left or right, which tooth.
- Stay safe: distance, angle from the beam, shielding and dosimeters. K40 (quality assurance and safety for diagnostic imaging).7
Core concepts
Image receptors
Three kinds of receptor go in the mouth.
- Dental film: has an embossed dot on one corner. The convex side of the dot faces the x-ray beam. A lead sheet sits on the back side, so the film is hard to expose backwards.2 Film must be developed and fixed; chemistry is changed when processing slows, after about 20 small (size 0 or 2) films or 10 to 15 size 4 films.2
- Photostimulable phosphor (PSP) plates, also called computed radiography (CR) or indirect digital: the plate is exposed, removed from the mouth and scanned to get the image. Plates come in all sizes, 0 to 4.2 The side with writing goes toward the back of the mouth; the blank side faces the tube head.1
- Direct digital (DR) sensors: wired to the computer, so the image appears within seconds. The cord exits through the front of the mouth, on the side away from the tube head. The largest sensor is size 2.12
Digital systems cut radiation exposure (shorter exposure times), give images faster and make retakes easier.2
| Size | Dimensions | Typical use |
|---|---|---|
| 4 | 57 x 76 mm | Largest; mostly extraoral views. Plates and film only. |
| 2 | 31 x 41 mm | Maxillary and rostral mandibular views; mandibular premolars and first molar. |
| 1 | 24 x 40 mm | Mandibular cheek teeth in small cats. |
| 0 | 22 x 35 mm | Mandibular cheek teeth in small cats. |
Source: Niemiec 2014, feline dental radiography primer.2
The dental x-ray unit
Exposure depends on kilovolt peak (kVp), milliamperage (mA) and time. On dental units kVp and mA are fixed, so time is the only setting you change.2 The position indicating device (PID) is the lead-lined cone or cylinder that directs the beam. It standardizes images and reduces radiation to patient and operator.1
Parallel technique
Place the receptor lingual to the teeth and parallel to their long axis, projecting below the ventral margin of the mandible and above the crowns, with a clear 3 mm margin around the tooth. Aim the central beam perpendicular to the receptor and bring the tube close.5 This gives the most accurate image. It works only for the caudal mandibular cheek teeth: dogs and cats have no arched palate, and the mandibular symphysis blocks parallel placement for the canines, incisors and rostral premolars.1
Bisecting angle technique
Place the receptor as close to parallel with the roots as you can. Estimate the angle between the root and the receptor, cut it in half, and aim the beam perpendicular to that imaginary bisecting line (Figure 1). It is based on equal triangles, so the image length matches the real tooth.1
Errors come from the beam angle to the receptor:
- Too small (beam too flat to the receptor): the tooth looks longer than it is. This is elongation. Fix: rotate the tube head more perpendicular to the receptor.1
- Too great (beam too steep): the tooth looks shorter. This is foreshortening. Fix: rotate the tube head toward parallel with the receptor.1
Procedure or technique
- Position the patient. The teeth being imaged go closest to the beam. Dorsal recumbency for mandibular canines and incisors; dorsal or lateral for mandibular cheek teeth. For maxillary teeth some dentists use sternal and others lateral recumbency.1
- Place the receptor. Rest it against the teeth and soft tissues to limit distortion. Roots are about twice as long as the crown, so cover the whole tooth. If a size 2 sensor cannot cover a big dog tooth, place it far enough apically to show the apex plus 3 mm, and take a second image for the crown.1
- Position the tube head using the angles in the table below.
- Set the exposure. Use the species, receptor type and tooth presets on computer-controlled units and adjust as needed.1
- Expose. Leave the room if you can. Hold the exposure ("dead man's") button until the unit stops beeping; letting go early stops the exposure and gives an error.1
- Check the image for both apices, the whole tooth and no distortion, then retake if needed.
| Tooth group | Technique | Receptor placement | Beam |
|---|---|---|---|
| Mandibular premolars and molars | Parallel | Lingual to teeth, parallel to roots | 90 degrees to receptor |
| Maxillary premolars and molars | Bisecting angle | Flat across the palate | 45 degrees, rotated laterally |
| Canines and incisors (both jaws) | Bisecting angle | Flat in the mouth, under the teeth | 70 degrees (rotate 20 degrees rostrally) |
| Maxillary canine | Bisecting angle | On the palate | 70 degrees plus about 20 degrees lateral, so the root lies over the nasal cavity, not the premolars |
| Rostral mandibular premolars (P1, P2 dog; P3 cat) | Bisecting angle | As for mandibular canines | 45 degrees laterally |
| Feline maxillary cheek teeth (optional) | Extraoral | On the table under the head, side to image down, mouth gag in | About 30 degrees through the open mouth |
Source: Niemiec, Today's Veterinary Practice, intraoral techniques.1 WSAVA lists parallel (mid to caudal mandible), extraoral or near-parallel (caudal maxilla in cats) and bisecting angle (all other areas).5
Full-mouth series and mounting
A full-mouth series images every tooth, including both apices of each root. A standard full-mouth set in dogs is 10 to 14 views, showing all the teeth with 2 to 3 mm of the periapical area visible for each root. The number taken depends on the operator, the size and shape of the head and the receptor size.6 Label any extraoral image as extraoral.1
To orient an image, view it with the dot facing you (digital software usually does this), as if your eyes were the tube head.2
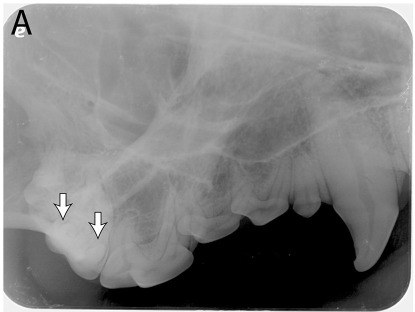
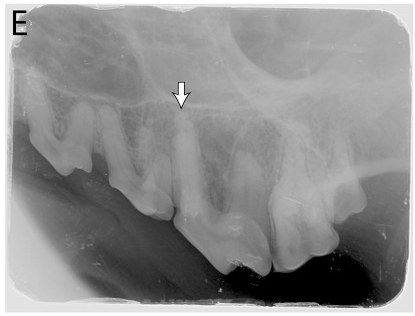
- Maxilla or mandible? Maxillary views show nasal turbinates, may show the three-rooted fourth premolar and show a radiodense line just dorsal to the premolars. Mandibular views show a large two-rooted molar and may show the symphysis, the mandibular canal or the ventral cortex.2
- Rotate, do not flip, so roots point up on maxillary views and down on mandibular views. The image then looks as if the animal is standing in front of you.2
- Left or right? Teeth get larger going distally. On a cheek-teeth view, if mesial is on the left of the image, it is the patient's left side. On canine and incisor views, the patient's right is on your left, like a ventrodorsal abdominal radiograph.2
Normal radiographic anatomy
- Periodontal ligament (PDL) space: a thin black line around every root.2
- Lamina dura: the bone lining the socket next to the PDL space. A widened PDL or a thickened or broken lamina dura can be a subtle sign of periapical disease.2
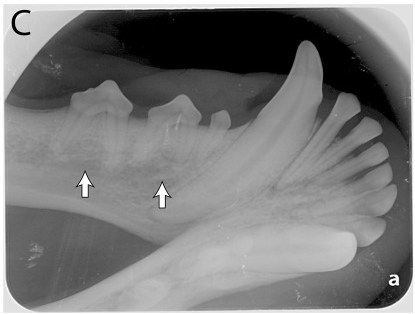
- Mandibular canal and ventral cortex of the mandible on mandibular views.2
- Mandibular symphysis: a central black line on rostral mandible views. It is fibrocartilage, not a fracture.2
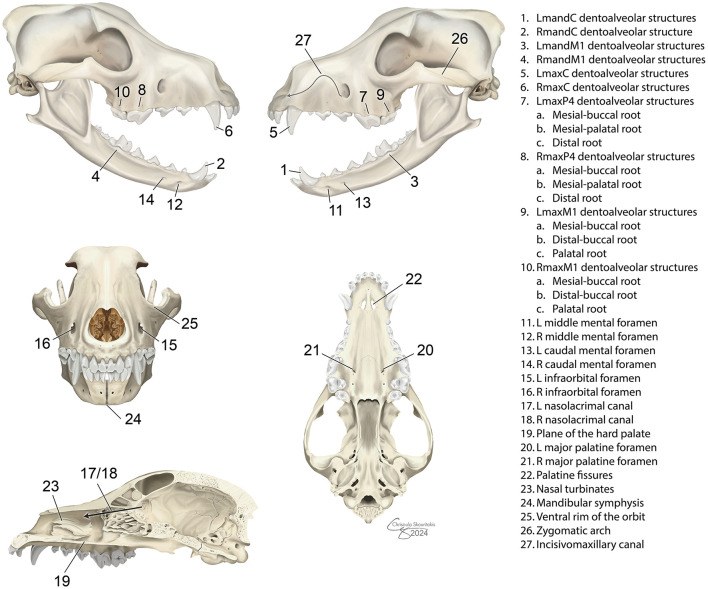
- Palatine fissures: paired lucent areas distal to the maxillary intermediate incisors.2
- Mental foramina: normal openings in the rostral mandible, seen on mandibular incisor and canine views (Figure 4). Know them so you do not report them as lesions.6
Tube shift and the SLOB rule
The maxillary fourth premolar has three roots. On a straight 45 degree lateral view, the two mesial roots overlap. To split them, keep the 45 degree vertical angle and rotate the tube head about 30 degrees mesially or distally in the horizontal plane.1
SLOB means same lingual, opposite buccal. The root that is more lingual (palatal) moves in the same direction you shift the tube; the buccal root moves the opposite way. With a distal shift, the palatal root moves caudally relative to the buccal root. With a mesial shift it moves rostrally. A simpler check: on a distal shift the distal root is clear of the first molar and the palatal root is the middle one.1
Flowchart
Species differences
- Cats: the zygomatic arch overlies the maxillary third and fourth premolars and first molar on intraoral views. The extraoral technique avoids this.1 Cats rarely need a size 4 receptor, so size 1 or 2 sensors are usually enough, and size 0 or 1 can be easier in small cats.2 Usually one exposure setting suits the maxilla and one the mandible.1
- Dogs: about five exposure settings cover the mouth. Large breed teeth often need two images per tooth with a size 2 sensor, one for the root and one for the crown.1
- Maxillary canine root lies over the first and second premolars in dogs and the second (sometimes third) premolar in cats, which is why the extra lateral rotation is needed.1
Calculation
Worked example: the bisecting angle. A sensor lies flat across a dog's palate. The maxillary premolar roots are straight and stand at about 90 degrees to it. Half of 90 is 45, so the beam goes 45 degrees to the sensor.1
Canines and incisors. These roots curve back at about 40 degrees to the palate or mandible. Half of 40 is 20. Subtract from 90: 90 minus 20 = 70 degrees to the sensor. In practice you rotate the beam 20 degrees rostrally from perpendicular.1
Error check. If the maxillary premolar image was taken at 25 degrees instead of 45, the angle is too small and the roots are elongated. At 65 degrees the angle is too great and the roots are foreshortened.1
Safety, legal and client education
- Radiation sources in the dental suite are the primary beam, scatter and leakage from the tube head. Stay out of the primary beam. Reduce scatter exposure by standing at least 6 feet from the source, at 90 to 135 degrees from the beam, and by not touching the tube head or housing during exposure.3 Today's Veterinary Practice gives 90 to 130 degrees.1
- AAHA lists a lead shield or apron, a thyroid shield and a radiation dosimeter for radiation protection.3
- Time, distance and shielding are the main controls; no dose is considered completely safe, so keep doses as low as possible. Hands-free radiology is encouraged.8 Never hold the sensor in the mouth with your hand.
- Client education: if full-mouth radiographs cannot be taken, the team must tell the client that a complete, comprehensive examination cannot be performed. Radiographs find disease that is not visible, and one study found 28% of grossly normal dog teeth had clinically important findings.3
Common mistakes and exam traps
- Aiming at the tooth or the receptor. In the bisecting angle technique the beam is perpendicular to the bisecting line, not to either one.
- Mixing up the fixes. Elongated: go more perpendicular. Foreshortened: go more parallel.
- Using the parallel technique on the maxilla. The flat palate makes it impossible in dogs and cats.
- Receptor backwards. The dot's convex side, the blank side of a PSP plate and the front of a DR sensor face the tube head.
- Flipping instead of rotating a digital image swaps left and right.
- Calling the symphysis a fracture or a mental foramen a lesion.
- Apex cut off on rostral mandibular premolars with the parallel technique: switch to a 45 degree bisecting angle.
Memory aids
SLOB: Same Lingual, Opposite Buccal. The lingual or palatal root moves the same way the tube is shifted; the buccal root moves the opposite way (published rule, Today's Veterinary Practice).
90, 45, 70: mandibular cheek teeth 90 degrees, maxillary cheek teeth 45 degrees, canines and incisors 70 degrees (memory aid for the simplified technique).
Small angle, long tooth: a beam angle that is too small elongates; too great foreshortens (memory aid).
Six feet, right angle: stand at least 6 feet away and about 90 to 135 degrees from the beam (memory aid).
Dot to the beam: the convex side of the film dot faces the tube head, and you view the image with the dot toward you (memory aid).
Quick review
- Parallel technique works only on the caudal mandibular premolars and molars.
- Bisecting angle: halve the tooth to receptor angle and aim perpendicular to the bisector.
- Too small an angle elongates; too great foreshortens.
- Simplified angles: 90, 45 and 70 degrees.
- Maxillary canine: add about 20 degrees lateral to clear the premolars.
- SLOB: the lingual root moves with the tube shift.
- Rotate, do not flip; teeth get bigger distally.
- DR sensors give images in seconds; PSP plates must be scanned; film needs processing.
- Six feet, 90 to 135 degrees from the beam, shield and dosimeter.