Introduction
Asepsis means keeping microorganisms out of an open surgical wound. The surgical team does this by building a sterile field and then guarding it with a fixed set of rules for hand preparation, gowning, gloving, posture and movement.1 As a veterinary technician you may scrub in as the sterile assistant, or you may circulate as the nonsterile team member who opens packs and fetches supplies. Either way, you are often the person who first sees a break in technique. This guide covers the scrub, gown and glove sequence, which parts of a gowned person are sterile, and what to do when sterility is in doubt.
Key facts
- On a gowned person, only the front from chest to the level of the sterile field and the sleeves from 2 inches above the elbow to the cuff are sterile.1
- The back, neck, shoulders, underarms and anything below the waist are unsterile, even on a wraparound gown.3
- An anatomic timed hand scrub takes 5 to 6 minutes; a 10 minute scrub gave more positive skin cultures, not fewer.2
- Alcohol hand rubs go on clean, dry skin and are not rinsed or towel dried. They work at least as well as antimicrobial soap scrubs.211
- Closed gloving is used only for the first gloving after gowning. Any later glove change is done by open gloving, because the gown cuff is no longer sterile.3
- If there is doubt about an item's sterility, consider it not sterile.1
- Nonsterile staff keep a margin of safety of at least 12 inches (30 cm) from the sterile field.1
How the VTNE tests this
- Function as a sterile surgical technician (Domain 2, Surgical Nursing, Task D) and as a circulating, nonsterile technician (Task E).13
- Maintain aseptic conditions in the surgical suite and during procedures (Domain 2 Task G; knowledge area K14, aseptic techniques).13
- Expect items that ask you to identify the sterile zone of a gown, choose open or closed gloving for a situation, or pick the correct response to a contamination event.
- Expect sequence items: scrub order, rinsing direction, gowning then gloving.
Core concepts
Sterile and nonsterile team members
The surgical team has sterile ("scrubbed") members who work in the surgical field and nonsterile members who work around its edges. Everyone wears scrub attire. Scrubbed members also wear a sterile gown, mask and gloves.1 A cap and mask are put on before entering the surgical area. A surgeon's hood covers facial hair.8 Scrub tops and trousers that become soiled with dirt or hair should be changed before returning to surgery.10
Why scrub if you wear gloves?
Gloves are not a perfect barrier. One guide reports that as many as 38% of sterile surgical gloves have punctures by the end of surgery.10 The hand scrub lowers the number of bacteria that could reach the patient through a hole. It removes transient bacteria and reduces resident skin flora.210 Remove all jewelry. Keep nails short and free of polish, including clear polish, and do not wear artificial nails, because all of these harbor bacteria.2
The sterile zone of a gowned person
A gown is sterile only where the wearer can see it. That is the front from chest to the level of the sterile field, and the sleeves from 2 inches above the elbow down to the cuff.1 The wrist cuff, back, neck, shoulders and underarms are unsterile, as is anything below the waist. The back is unsterile even on a wraparound gown that no unsterile person tied.3 Keep gloved hands at chest level, below the neckline and above the waist. Never tuck them into the armpits.6
Drapes, packs and strike-through
Once the patient and tables are draped, only the top surface of the drape is sterile. A drape that has been placed should not be moved.1 Strike-through is the passage of microorganisms through a barrier when fluid soaks it. Fluid gives bacteria a route to the sterile item.1 Plain cotton muslin (type 140, 140 threads per square inch) allows strike-through when wet.3 A sterile package dropped on the floor is also suspect, because the impact can force contaminated air into it.1 Sterility of a package depends on events, not on time.1
| Situation | Sterile? | Why |
|---|---|---|
| Front of gown at mid chest | Yes | Within chest to field level, in view1 |
| Back of a wraparound gown | No | The back is never sterile3 |
| Gown cuff after first gloving | No | Collects moisture; must stay covered by the glove3 |
| Gloved hands resting in the armpits | No | Underarms are unsterile6 |
| Side drop of a draped table | No | Only the top surface is sterile1 |
| Outer 1 inch edge of an opened wrapper | No | Margin of safety between sterile and nonsterile1 |
| Inside of an opened peel pack, past the inner heat seal | Yes | The inner edge of the seal is the dividing line1 |
| Wet spot soaked through a cloth drape | No | Strike-through1 |
| Pack dropped on the floor | No | Impact can force contaminated air in1 |
| Any item you are unsure about | No | When in doubt, consider it not sterile1 |
Source: Infection Control Today, Asepsis and Aseptic Practices in the Operating Room; Veterinary Surgery Online, Gowning and Surgical Posture.
Procedure or technique
Anatomic timed hand scrub
- Put on cap and mask. Remove jewelry. Open the brush pack where it will not be splashed.2
- Wet hands and forearms, lather, and clean under each nail with the nail pick. Rinse.2
- Note the start time. Use the sponge side on skin. Use the bristle side on the nails only, because bristles damage the skin and release bacteria.2
- First hand: nails, all four sides of each finger, palm, back of hand and wrist (2 minutes). Repeat on the second hand (2 minutes).2
- Each forearm to 1 inch above the elbow (1 minute each). Do not return to the hands once you have moved up the arm.2
- Rinse from fingertips to elbow in one direction, hands held higher than elbows so water runs away from the hands. Do not shake the hands.2
- If you touch the sink or tap, add 1 minute of scrubbing to the contaminated area.2 Some protocols instead restart the scrub; follow your hospital's policy.10
Some clinics use a counted brush stroke method instead of timing. One guide applies 20 strokes to each of four sides of every finger and of the forearm.10 Between consecutive cases on the same day, a 3 to 5 minute scrub is enough.2
Worked example: timing an anatomic scrub
Hand 1 (2 min) + hand 2 (2 min) + forearm 1 (1 min) + forearm 2 (1 min) = 6 min of soap contact.
During the scrub, your right forearm brushes the tap. Add 1 min to that area: 6 min + 1 min = 7 min total.2
Alcohol-based hand rub
An alcohol hand rub is a waterless alternative. Wash the hands with soap (not a scrub brush) and clean the nails first. Dry the hands completely. Then apply the product to the nails, hands and forearms to just above the elbow, in the doses the label states, and rub until dry. Do not use a towel.2 Veterinary textbooks recommend contact times of 1.5 to 2 minutes for these rubs, or the manufacturer's time.9 Where clean running water is limited, an alcohol rub is preferable to scrubbing with water that may be contaminated.10
| Feature | Anatomic timed scrub | Alcohol hand rub |
|---|---|---|
| Typical agents | Chlorhexidine gluconate, povidone-iodine, hexachlorophene soaps2 | Alcohol, with or without chlorhexidine2 |
| Skin condition at start | Wet | Clean and completely dry2 |
| Contact time | 5 to 6 min (3 to 5 min between cases)2 | 1.5 to 2 min, or per label9 |
| Rinse and towel | Rinse fingertips to elbow; dry with sterile towel | No rinse; rub until dry; no towel2 |
| Effectiveness | Standard method | At least as effective as antimicrobial soap11 |
Source: Veterinary Surgery Online, Hand Preparation/Scrubbing; Anderson et al. 2013 (BMC Vet Res); Mann, Veterinary Evidence knowledge summary.
Gowning
- Pick up the gown by the inside, finding the neck collar first. Only the inside of the gown touches your hands.3
- Step away from the table into open space. Slide both arms into the sleeves at once and let the gown unfold.3
- For closed gloving, keep your hands inside the sleeves.12
- A nonsterile assistant ties the neck and back ties without touching the front. A front-tying gown is tied by the wearer after gloving, with help passing the paper tab.3
Closed gloving
Closed gloving is done only for the first gloving after gowning, while the gown cuff is still sterile.4 Your fingers never leave the sleeve until they go into the glove.
- Working through the sleeve, open the glove wrap so the palm side of the gloves faces up.4
- Lay the first glove on the upturned sleeved palm: palm to palm, cuff to cuff, thumb to thumb, with the glove fingers pointing toward your elbow.4
- Grasp the glove cuff through the sleeve with both hands and stretch it over the gown cuff.4
- Push the hand through the gown cuff into the glove while unrolling the glove cuff over the sleeve.4
- Glove the second hand the same way before adjusting either glove. Then adjust so the gown cuff is fully covered and the fingertips fit snugly.4
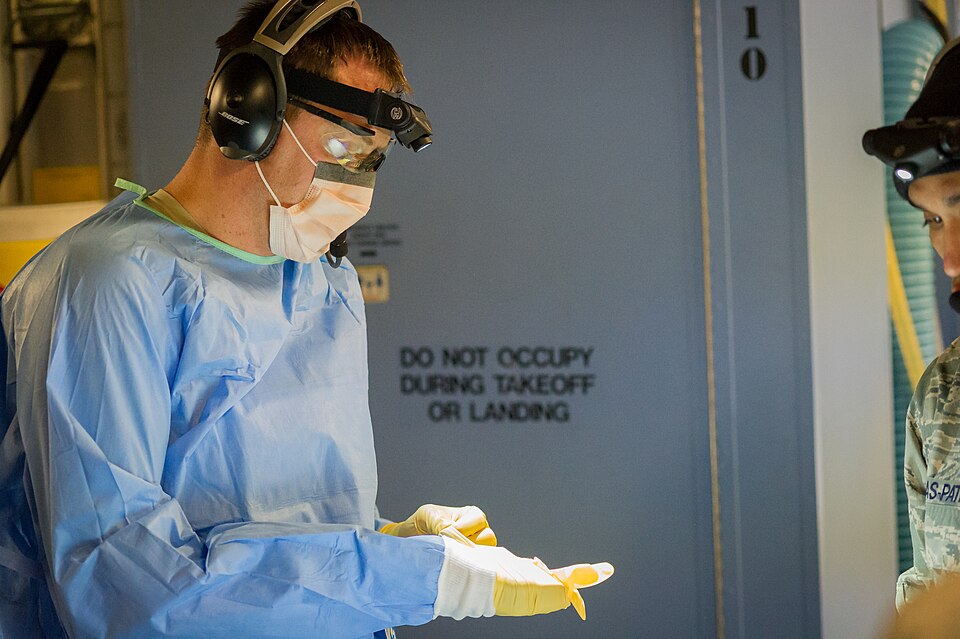
Open gloving
Open gloving is used when no gown is worn, and to replace a glove during surgery, because the gown cuff is no longer sterile.5 The bare hand touches only the folded inner cuff of the first glove (the part that will lie against the skin). The gloved fingers then slide under the folded cuff of the second glove, touching only its sterile outside surface.5 When regloving, have an assistant remove the contaminated glove without pulling the gown cuff down. Do not open the new glove pack on the instrument table.57
Moving around the sterile field
- Scrubbed staff pass each other back to back or face to face.1
- Nonsterile staff face the sterile field on approach, never walk between two sterile fields, and never reach over a sterile area.1
- When opening a wrapped pack, open the far flap first, then the sides, and pull the last flap toward yourself, so you never reach over the contents.1
- Present items to the scrubbed person or place them securely. Do not toss them onto the field.1
- Pour sterile fluids slowly to avoid splashing and strike-through. Once a bottle is opened, pour all of it or discard the rest.1
- If a scrubbed person sits, use a stool without a back so the elbows are not contaminated.6
- Never leave a sterile field unattended. Set it up as close as possible to the time of use.1
Flowchart: was sterility broken?
When a break happens, the team must act immediately to correct it.1 A contaminated glove is removed by an assistant and replaced by open gloving.5 A dropped pack or instrument is not returned to the field. Speak up even when it was the surgeon who broke technique. Each team member is expected to correct improper technique they witness.1
Species differences
The rules of asepsis are the same for dogs, cats, horses and food animals. What changes is the setting. In one study of ten Ontario companion animal clinics, masks were worn for all abdominal and limb procedures, but every procedure done without a mask was a cat neuter.9 A teaching compendium lists the procedure (cat neuter compared with cat spay), the surgical site, field or emergency conditions, and the species and purpose of the animal (a feedlot steer compared with a valuable breeding bull) as factors in choosing open or closed gloving.12 For a gowned procedure in any species, the gown and closed gloving rules above apply.
Safety, legal and client education
- Most surgical site infections come from bacteria the patient already carries, so asepsis protects the wound from the patient's own flora as well as from the team.9
- Anyone with a skin infection, rash or open lesion on the hands or arms should report it, because it raises the bacterial load and infection risk.10
- Repeated aggressive scrubbing damages skin. Damaged skin carries more bacteria, which is one reason gentler methods such as alcohol rubs are favored.92
- Observed practice falls short: in the Ontario study, poor closed gloving technique (exposed fingers or touching a nonsterile cuff) was seen in 21 of 50 closed gloving cases.9
- Client point: when an owner asks why surgery costs more than "just the procedure," sterile packs, gowns, gloves and trained staff are what keep the incision from becoming infected.
Common mistakes and exam traps
- Trap: "A wraparound gown is sterile all the way around." False. The back is never sterile.3
- Trap: closed gloving to replace a torn glove. The cuff is already contaminated, so regloving is open gloving.3
- Trap: "A longer scrub is always better." A 10 minute scrub gave more positive cultures than 5 to 6 minutes.2
- Mistake: rinsing back and forth, or holding hands below the elbows. Rinse fingertips to elbow, hands up.2
- Mistake: towel drying after an alcohol rub. Rub until dry; no towel.2
- Trap: "A pack is sterile until its expiry date." Sterility depends on events such as moisture, tears or a drop, not on time alone.1
Quick review
- Sterile gown zone: front from chest to field level, sleeves from 2 inches above the elbow to the cuff.
- Back, neck, shoulders, underarms and below the waist are never sterile.
- Keep gloved hands at chest level, in view.
- Anatomic timed scrub: 2 min per hand, 1 min per forearm, 5 to 6 min total.
- Hands above elbows; rinse fingertips to elbow, one direction.
- Bristles on nails only; sponge on skin.
- Alcohol rub: clean dry hands, rub until dry, no towel.
- Closed gloving for first gloving only; open gloving for any change.
- Only the top of a draped table is sterile.
- Wet drape or wrap means strike-through, so it is contaminated.
- Nonsterile staff keep at least 12 inches (30 cm) away and never reach over the field.
- If in doubt, it is not sterile.